Monday, May 23, 2011

Egg Drop Challenge - Iteration #1

30 Achievements


Weight 42.8g

1-3 Create a Sketch of possible solution

4. Use a decision matrix

5.List of Materials for build day

6.Plan for bringing in materials.-
I found the styrofoam ;While Austin planned to bring in the parachute material (tissue paper), and I was tasked wiith bringing in the string.

7.Material fit in Printer Box

8.Materials fit in shoe box

9-14. Weighs less than 50g
weighed 42.8g

15-19. Hit Bullseye

20-26. Egg didnt break/crack/spill

27. Describe using Alebra
28. Describe using Arithmetic
29. Describe using Geometry
30. Describe using calculus


5) What designs from your class did well? Based on the achievements you earned, how would you redesign your solution to score better? Be specific (sketches with labeling work well for this).
The parachute designs seemed to do the best. The parachute slowed down the egg enough to were the force of the landing wasn't enough to break the egg. If I had to redesign my project, I would try and shave off a few grams to try and get it under 25g and fit into an altoid box. I would have used only a parachute and made a harness with which to put the egg in. If we did this, im confident we would not lose any of our current achievements and we would have improved the efficiency of our design.

Thursday, May 12, 2011

Glider Challenge

1.
Final Glider


2. Design Phase

1) The challenge is to create a glider using balsa wood and tissue paper. We have to make a glider that will hopefully glide the longest for the greatest amount of distance and most hangtime, if not both then it should do one of those things.

2) There are no rules to brainstorming. We went through all possible ideas and considered what would be the best approach to create the best design. We took ideas from the gliders around the class and we went online to look up ways in which the most efficient gliders are built, we then took these ideas to help create our own. Our idea was to create a glider with a short glider with long wings, angled up at 15 degrees and curved at the tips to reduce turbulance, then put two horizontal fins as well as one vertical fin. We ended not being able to to curve the wings because the wood would bend enough, also we ended up not being able to angle thie wings also, so we had to just put them flat, and we couldn't put a vertical wing because of lack of material.

3) Criteria: We had to use the material, the blasa wood and tissue paper, nothing else, and had to use glue and tape to stick things together, nothing else.

Constraints: The criteria really limited our creativity because we couldn't just use any material we wanted which limited what we could do.


4)

3. Test Phase

+
1.       Solid flight
2.       Ok distance
3.       Good wing hole

Outcomes to change
1.       Try to lengthen flight time
2.       Try to lengthen flight distance
3.       Try to decrease the size of the plane

?
1.       Short flight time
2.       Lack of controllable direction

Ideas
1.       Increase stability of the plane
2.       Decrease the size of the plane’s wings
3.       Increase amount of tissue paper


Our main goals for our glider our to increase the distance it can go and I think decreasing the wing size and using more tissue paper and trying to add stability to the wings are our main goals.
4. Performance and Improvements
Our glider did not perform very well at all, it dropped immediately and went backwards. I i think a lot of it had to do with the wings, the wings needed to be much shorter because they were to heavy and caught too much wind, the shape of the wings need to be changed because they weren't efficient, and lastly the wings were not supported right they were to flmsy. Also we needed to put on a vertical fin, that would have helped a lot.

Tuesday, April 12, 2011

Achievements

For future projects, I believe that an achievement for using little to no pneumatic devices would be extremely unique and challenging, as most groups used multiple in their projects. I also think that an achievement where you leave out a key component of the intended design (in our case we left out the magnets) which would encourage innovative and creative designs.

Helping Hand

Tom helped our group out early on by giving us a design tip. He was the one that showed us how to create pressure in our pneumatic system and how to wire the pneumatic motors a certain way that made it easier to program with.

Reflection

In my opinion, we accomplished our objectives very well. We were able to create an innovative and unique design that completed the process with a lot of time to spare. In the future, I think we would use a magnet instead of using our spring because the major flaw in our design was that we could only complete the process if the wooden marbles did not follow a metal marble. The results fulfill the problem statement very well because we were able to sort out all 5 different types of marbles into different bins in less than two minutes (1:20 seconds was roughly our time). Freddy and I have learned the importance of an attention to detail, because the smallest adjustments produce a misreading that leads to a failed attempt, whether it be with the bins that catch the marbles pushed off by the spring, or the gate that lets the photo resistor differentiate between the colors of the marbles. We have learned how to program as well, our program was very complicated and we used a couple subprograms to achieve our desired result. We had a few challenges that faced us with regard to working in a team, one of us would bump something that we had been working on fixing or change part of the program which instead of helping us take a step forward, made us take two steps back. The purpose of this design problem was to teach us to work in teams, be able to program and use the various Fisher robotics parts, and finally show us some of the skills needed to use later on in our engineering careers. These skills include: teamwork, attention to detail, perseverance, dedication, creativity, and most of all, the importance of consulting with our peers on common problems.

Final Design

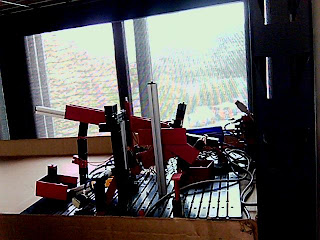
1. This is where our design begins This is the Compressor which builds the necessary pressure to operate the Pneumatics, and is stored in the blue container.


2 a. Here if the marbles are small enough, (either the wood or metal) the follow the track down the track where the heavier one (metal) will go past the spring and the lighter (wood ) will "spring backwards to a different bin

2. b. If the marble is too large to fit into wood and metal marble track it is stopped in front of the Pneumatic device which launches it onto another track.


4. On the next track the marble is stopped by our gate which is programed to hold the marble in place in front of the Photosensor to get an accurate reading of the marbles translucency.


5 Last, depending on what reading the photosensor gets it will fire one or none of the Pneumatics to either guide the marbles off the track or let it follow it all the way down the track.


6. Here is our main program. This program is responsible for seperating the metal/wooden marbles from the glass marbles (discussed in part 2)

7. Next, we have our glass program.
This was the part of the programming that took the most time to complete. We had to spend quite a few class periods to finally find the values that worked. When the marble arrives at the photoresistor, this program dictates what happens based on that reading. If the photo resistor gets a reading less than 240, it moves onto the next branch of the program. If its more than 240, the marble is placed in the bin on the right. The next branch takes that reading and if it is more than 200, then it is placed in the bin on the left. If it is less than 200, then nothing happens and it rolls into the bin waiting at the bottom of the ramp.

8. Lastly, we have our gate program. This program is responsible for controlling the gate that keeps the marble in the photoresistor long enough for it to get a reading.

We had to find times that worked so that the gate did not move to a different spot at any point during the trial. We found that the gate moved faster going down than it did going up, so, as you can see in the program, we made it go 1.5 seconds up and 1.4 seconds down to combat this problem.

Monday, April 11, 2011

Design Modifications

Altogether we didnt have too many modifications to our machine


  • Here we added another flat piece attached to the metal pole to prevent anymarble from being lauched too far and off of the track.


-Here we added another support beam in order to further stabilize our gate to get more consistent readings from our photosensor.


  •  To further stabilize our gate, in order to get consistent readings for the photosensor we added the flat red pieces to reduce any twisting or torquing of the building blocks.
  • Also we flipped around the motor itself to reduce the amount of give it would have from going up and down.